Profile
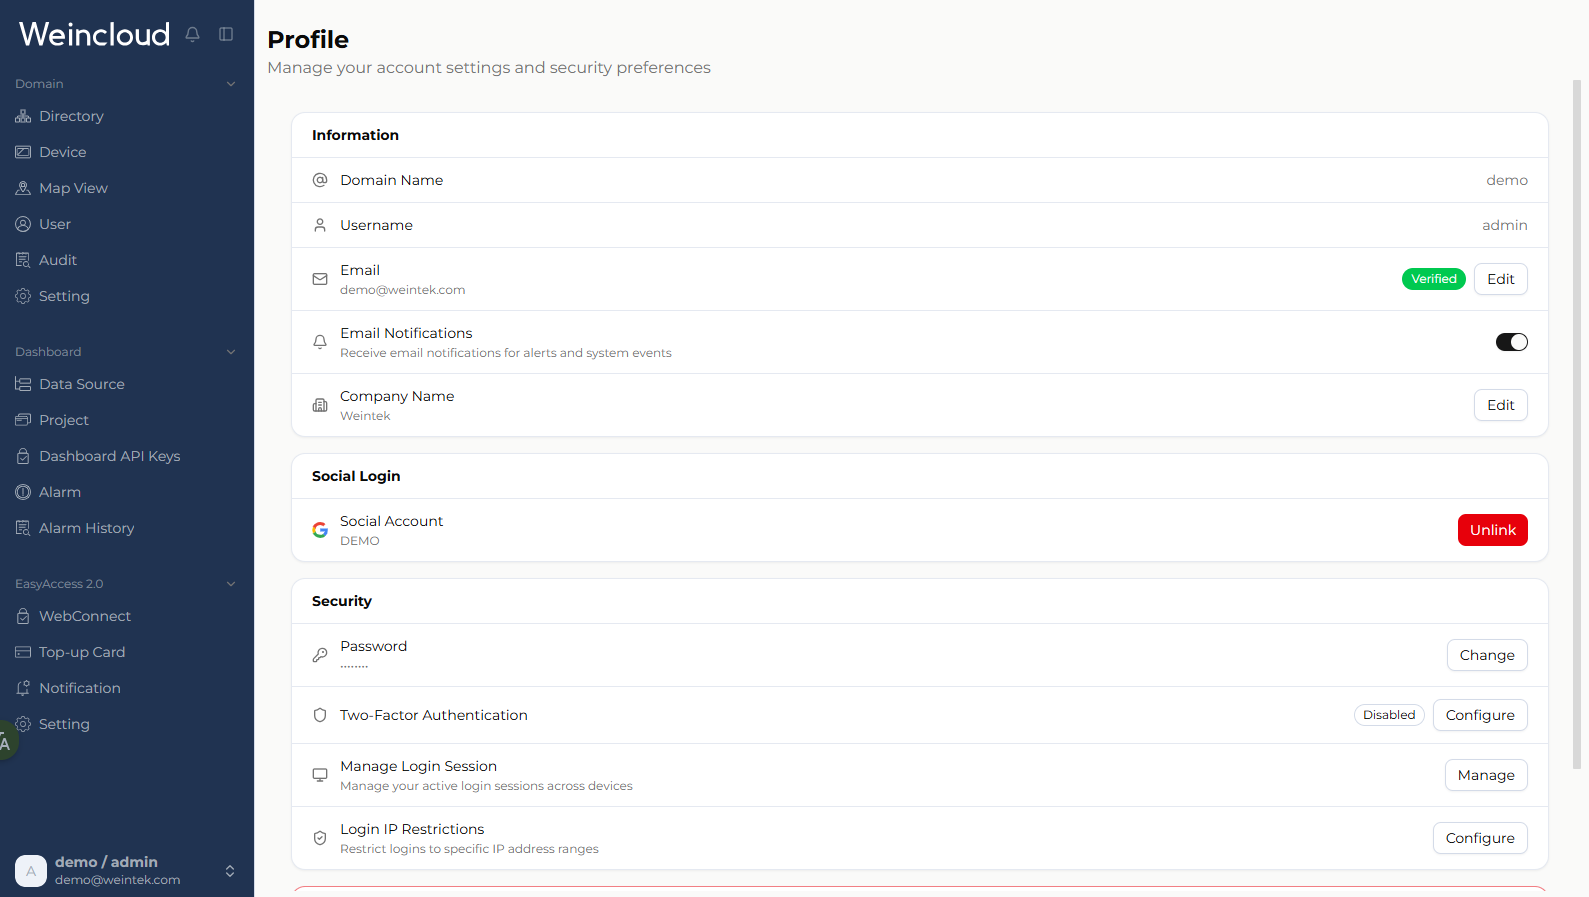
The [Profile] page is the single entry point for managing your own account. It covers three areas: maintaining account information (email, notification preference, company name), hardening login security (password, Multi-Factor Authentication (MFA), login sessions, login IP restrictions), and linking or closing the account (social account link, account deletion).
This page affects only the account you are currently signed in with. To manage other members, their permissions, or Domain-level policies, use the [User] and [Settings] pages instead — see User Management and Settings.
Page Layout
The page consists of four sections in order: [Information], [Social Login], [Security], and [Danger Zone]. Each item occupies a single row with its action button on the right ([Edit], [Change], [Configure], [Manage], and so on). All changes are made in a dialog; nothing takes effect until you click [Save].
Information
Domain Name and Username
[Domain Name] and [Username] are read-only. They identify the account you are signed in with and cannot be changed on this page.
Email
Email is the only delivery channel for system notifications, password resets, and identity verification, so its verification state directly determines whether other features are available. A badge on the right of the row shows [Verified] or [Unverified].
While the email is unverified, the following are unavailable:
- Email-based MFA ([Email OTP] and [Email + TOTP App])
- Unlinking a social account
Verifying the Email
When the email is [Unverified] and no email change is pending, a [Verify] button appears on the row.
- Click [Verify]. A 6-digit code is sent immediately to the current email address.
- Enter the code in the dialog. It is submitted automatically once all six digits are entered; you can also click [Verify] to submit manually.
- If the message does not arrive, wait for the countdown to end and click [Resend code]. The countdown length is determined by the server.
Changing the Email
Click [Edit] to open the change dialog, enter the new email address, and complete identity verification:
- Password accounts: enter the current password.
- Social login accounts: re-authenticate with the original social login provider. You are redirected to that provider and returned to this page after authentication.
Once submitted, the change does not take effect immediately. Verification emails are sent to both the new and the current address, and the change is applied only after both are verified. During this period:
- A hint below the row shows the pending new address and the verification progress of each mailbox.
- The [Edit] button is replaced by [Cancel email update]. Clicking it and confirming discards the change, leaving the current address unchanged.
Email Notifications
A switch controls whether you receive email notifications for alarms and system events. Toggling it opens a confirmation dialog; the change takes effect immediately once confirmed, with no separate save step.
Turning the switch off stops all notification emails initiated by the system, but does not affect authentication emails such as verification codes and password resets. For the content and trigger conditions of alarm notifications, see Alarm Notification.
Company Name
Lets a Domain Superuser maintain the company name associated with the Domain. The value may be up to 255 characters and cannot be empty. Click [Edit], enter the name, and save.
Social Login
Linking a social account lets users sign in to Weincloud with a third-party account instead of remembering a password. This section covers only the link state of the current account; for the overall mechanism and account mapping rules, see Social Login.
When no account is linked, the row shows [Not linked] and a [Link] button. When an account is linked, the row shows its name or email address and provides an [Unlink] button. Each account can have one linked social account at a time; to switch providers, unlink first and then link again.
The available providers are determined by the server, typically:
| Server | Available providers |
|---|---|
| Global server | Email, Google, Microsoft, Apple |
| China server | Email, WeChat |
Linking a Social Account
- Click [Link], enter your current password, and click [Verify Password].
- Select the provider to link.
- Google, Microsoft, or Apple: you are redirected to the provider's authorization page and returned once authorization completes.
- Email: enter the email address and click [Send]. A 6-digit code is sent; entering the code completes the link. The code expires after a limited time and must be resent if it does.
- Once linked, you can sign in with that social account from the login page.
Unlinking a Social Account
The account email must be verified before unlinking. While it is unverified, the [Unlink] button is disabled and a tooltip explains why. This ensures a usable login and recovery channel remains after the link is removed.
After clicking [Unlink], identity must be verified again: password accounts enter the current password, while social login accounts re-authorize with the provider. The link is removed as soon as verification succeeds.
Security
Changing the Password
Click [Change] to open the dialog, then enter the current password, the new password, and the confirmation.
The new password must satisfy the Domain-level password policy. The dialog shows the Domain's current minimum length requirement; if password strength is enabled for the Domain, the new password must also contain uppercase letters, lowercase letters, digits, and special characters. For how the policy is configured, see Settings – Security.
Social login accounts can also set a password, but must first re-authenticate with the social provider instead of entering a current password.
After a successful change, you are required to sign in again: a dialog that cannot be dismissed appears, and clicking [Log In Again] redirects to the login page, where the new password must be used.
Multi-Factor Authentication (MFA)
Multi-Factor Authentication (MFA) requires a one-time code in addition to the username and password, so a leaked password alone is not enough to sign in. It is the single most effective measure for improving account security.
Authentication Methods
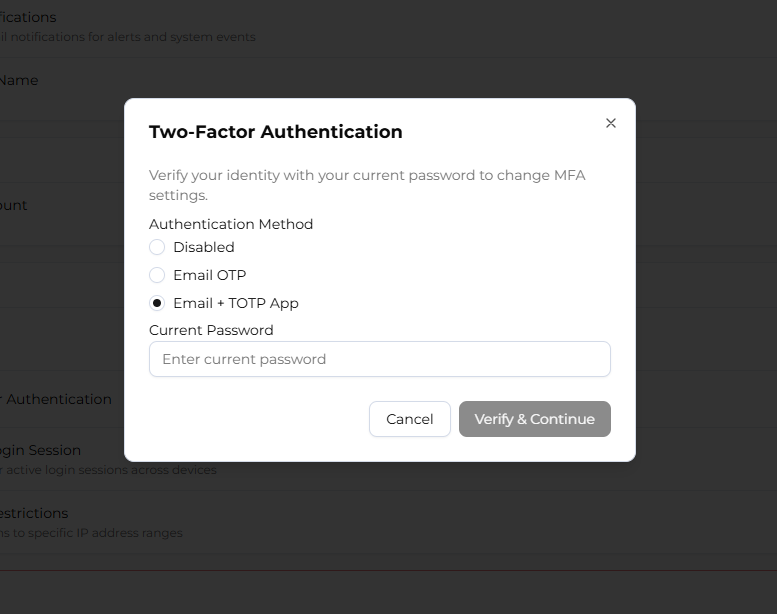
Click [Configure] to open the dialog and select one of three states:
| Method | Description |
|---|---|
| Disabled | Only the password is verified at login |
| Email OTP | A one-time code is sent to the registered email at login |
| Email + TOTP App | A one-time code is generated by an authenticator app, with email as a fallback |
Both [Email OTP] and [Email + TOTP App] require a verified email address. While the email is unverified, both options are disabled and an icon explains why. If MFA was configured previously, the dialog shows when it was last configured.
Every change requires entering the current password first, and the selected method must differ from the current state before it can be submitted.
Enabling Email OTP
(1) Select [Email OTP], enter the current password, and click [Verify & Continue].
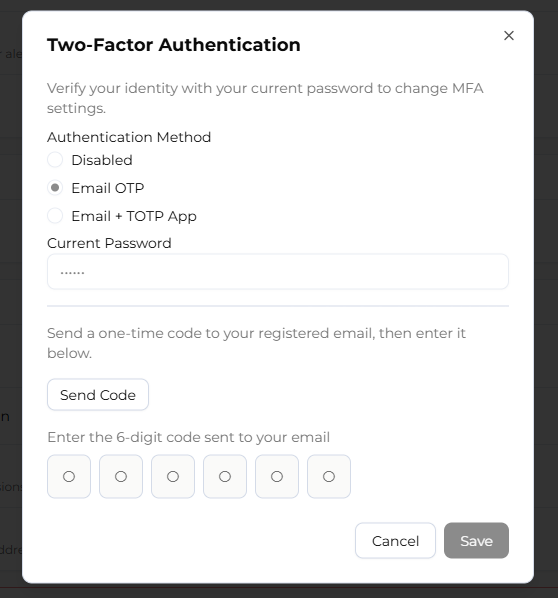
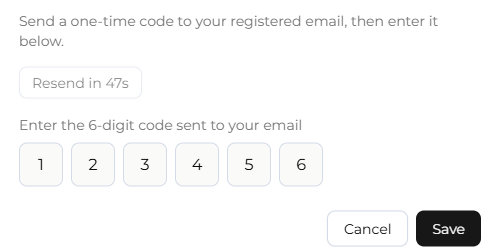
(2) Click [Send Code] and retrieve the 6-digit code from the email. After sending, you must wait 60 seconds before sending again.
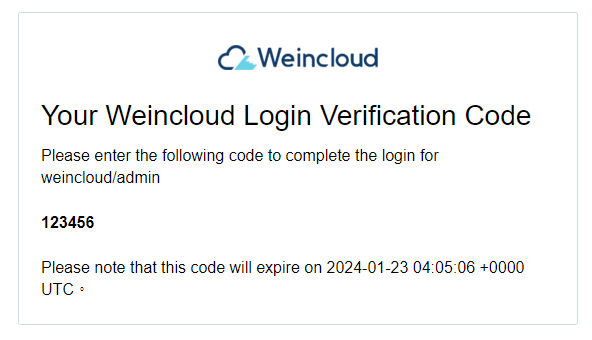
(3) Enter the code and click [Save] to complete the setup.
Enabling Email + TOTP App
(1) Select [Email + TOTP App], enter the current password, and click [Verify & Continue].
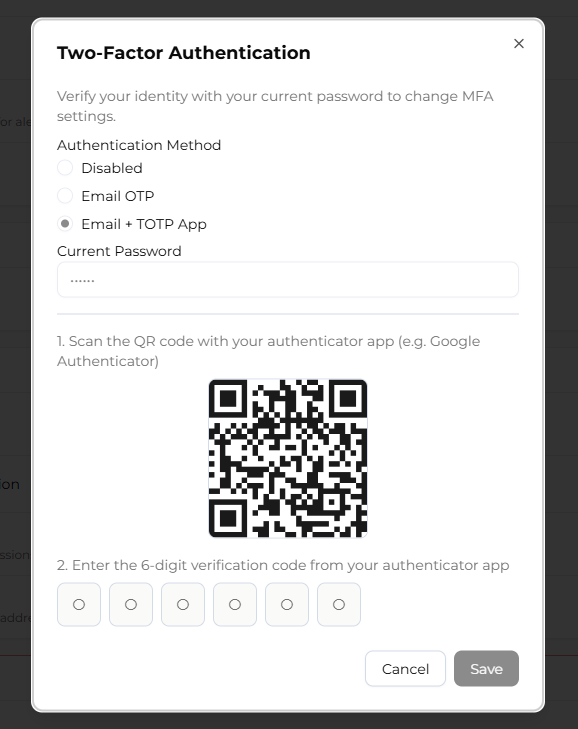
(2) Install a TOTP-capable authenticator app, such as Google Authenticator.
 |  |
(3) Scan the QR code shown in the dialog with the authenticator app to obtain a 6-digit code.
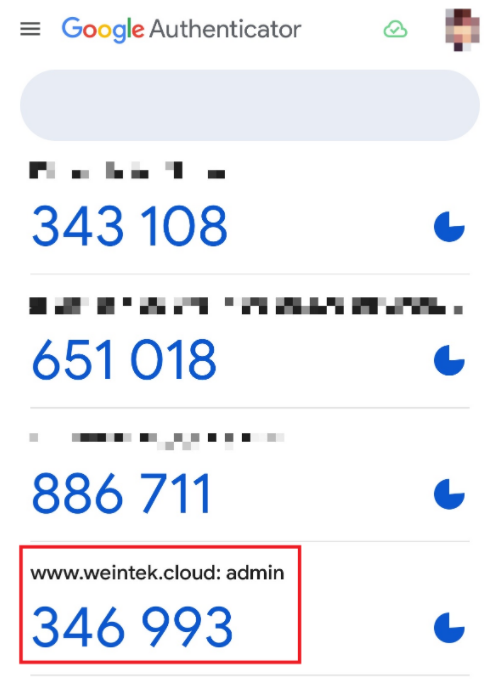
(4) Enter the code.
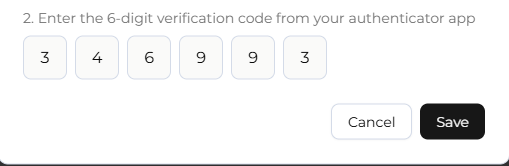
(5) Click [Save] to complete the setup.
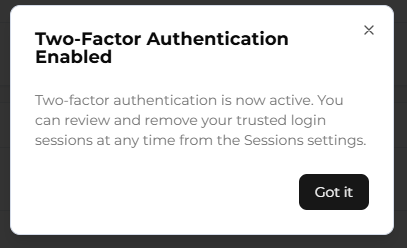
After MFA is enabled, a message reminds you that trusted login devices can be reviewed and removed at any time under [Manage Login Session]. Running [Logout All] once after enabling MFA is recommended, so that every device signs in again with MFA.
Disabling MFA
In the dialog, select [Disabled], enter the current password, and click [Save]. No verification code is required.
Login Flow
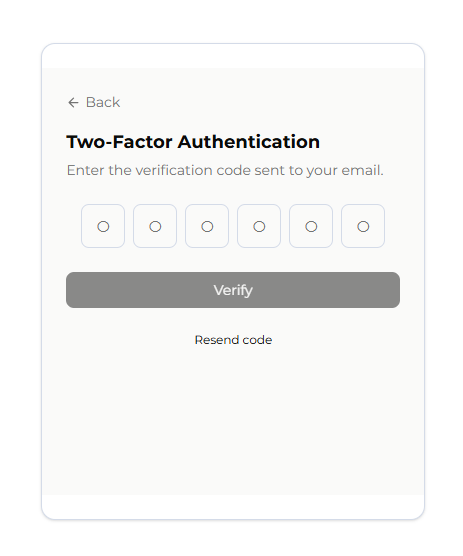
With MFA enabled, login gains one step: after the password is verified, you are asked for the 6-digit one-time code, and login completes only once it is accepted.
Login Sessions
[Manage Login Session] lists the login records that are still valid across your devices, letting you spot unexpected logins and terminate them. Click [Manage] to open the list. Each record contains:
| Column | Description |
|---|---|
| Last seen | When the session was most recently used |
| IP | Source IP; click the adjacent icon to look up its location |
| OS | Operating system |
| Client | Client name |
The session in use is marked [You] and has no logout button; every other record can be terminated individually with its logout icon. [Logout All] below the list signs out all sessions except the current one and requires confirmation. When the list contains only the current session, the button is disabled.
A device that has been signed out must enter the username and password again — plus MFA verification if MFA is enabled — before it can be used.
Login IP Restrictions
Restricts the account to signing in from specified IP ranges, which suits administrative accounts that are always used from a corporate network or a fixed site. This feature is available only to the account whose username is admin.
Click [Configure] to open the dialog:
- The top of the dialog shows your current IP as a reference.
- Click [Add] to add a range in CIDR notation, for example
192.168.1.0/24, then click the check icon to confirm that entry. - Existing entries can be edited with the pencil icon or removed with the trash icon.
- Once every entry is confirmed, click [Save].
Rules:
- Up to 5 ranges.
- IPv4 CIDR notation only; the prefix length must be between 0 and 32.
- An empty list means no restriction — all IP addresses are allowed.
- Saving is blocked while any entry is still being edited; confirm each entry first.
Before saving, make sure the list includes your current IP, or your next login will be rejected.
Danger Zone
Deleting the Account
Deleting an account permanently removes it and its related data. To guard against mistakes, the system applies a 7-day grace period: after the request is submitted, the account enters the scheduled-for-deletion state and is removed only 7 days later. During that time the account remains usable and the request can be cancelled.
Click [Delete Account] to open the dialog and complete the following:
- Identity verification: password accounts enter the current password; social login accounts re-authorize with the provider.
- Reason for deletion: required, up to 256 characters.
After clicking [Delete My Account], the dialog confirms that deletion has been scheduled. Back up everything you need to keep during the grace period — once it ends, the account is permanently deleted and cannot be recovered.
Cancelling Deletion
While the account is scheduled for deletion, [Danger Zone] shows the scheduled deletion date and a [Cancel Deletion] button. Clicking it cancels the schedule and returns the account to its normal state, and the Security and Social Login sections reappear.
The scheduled deletion date is the seventh day counted from the day the request was submitted.
Limitations and Notes
| Item | Limitation |
|---|---|
| Domain Name, Username | Read-only; cannot be changed on this page |
| Company Name | Up to 255 characters; editable only by a Domain Superuser |
| Email change | Takes effect only after both the new and current mailboxes are verified; cancellable until then |
| Password policy | Defined at the Domain level; per-user exceptions are not supported |
| Password change | Forces a re-login on success |
| MFA | [Email OTP] and [Email + TOTP App] require a verified email address |
| Social account | One linked account at a time; unlinking requires a verified email |
| Login IP Restrictions | admin only; up to 5 entries; IPv4 CIDR only |
| Account deletion | 7-day grace period, cancellable during that time; irreversible afterwards |
FAQ
Why does my old address still show after changing the email?
The new address is applied only after both the new and the current mailbox have been verified. Check the inbox (and spam folder) of both mailboxes, or review the verification progress shown below the row.
Why can't I select [Email OTP] or [Email + TOTP App]?
The account email is not verified yet. Click [Verify] on the [Email] row first, then return to the MFA settings.
I lost my TOTP authenticator app or changed phones and cannot sign in.
[Email + TOTP App] keeps email as a fallback channel, so you can receive the code by email instead. After signing in, reconfigure MFA to bind the authenticator app on the new device.
Does [Logout All] sign me out as well?
No. It signs out every session except the current one.
Can an account scheduled for deletion still be used?
Yes. During the grace period the account can sign in and operate normally, although the [Security] and [Social Login] sections are temporarily hidden. They reappear once the deletion is cancelled.